

- Acrylic paint in your color of choice. (You will ultimately need one cup of paint, so I would suggest getting 2-3 of the small bottles like I have in my picture.)
- 1 Tablespoon of Non-Sanded tile grout
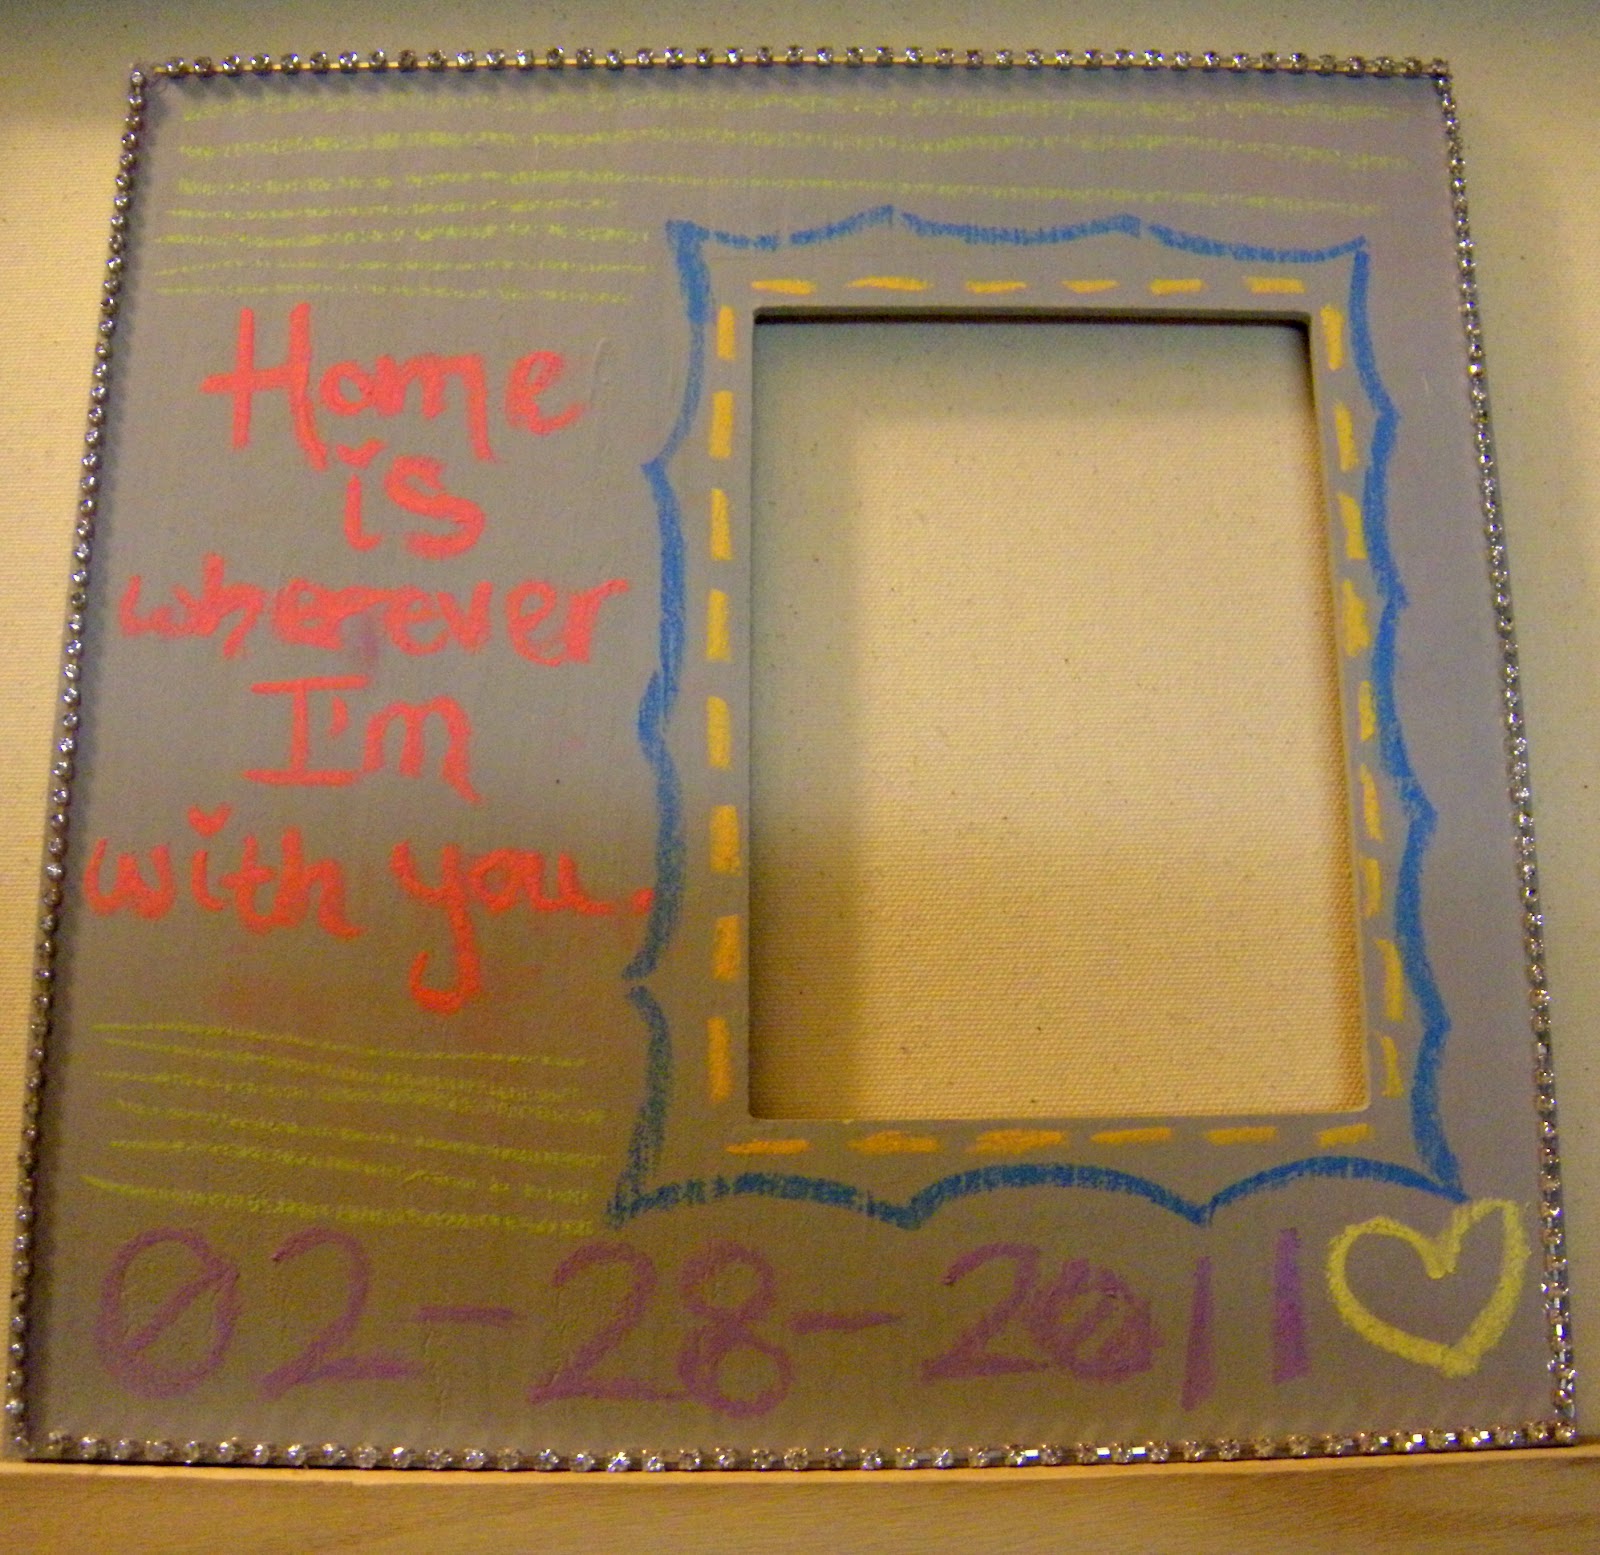
- A surface to paint on (I chose a wooden picture frame.)
- Foam brush or paintbrush
- 1 disposable cup to mix the materials
- Chalk, for the finished product!
Start by pouring 1 cup of paint into your disposable mixing cup. If you're mixing colors, make sure they are completely mixed with each other. I had a lot of half-full bottles of silver, white and black, so i made a mixture of those three colors until it was at a shade that I was happy with.


Now, go ahead and paint your surface with the paint. Make sure you do several coats of the paint, letting it dry between coats.

Once it's done drying, there may be some small bumps in the paint, so if that bothers you, you can easily fix that by lightly sanding it with fine-grit sandpaper.
I decided to bling mine out and add rhinestones around the edges, and decorate with chalk some chalk doodles and lyrics. A picture of Shane and I will be in the frame soon! :)
To remove the chalk, simply wipe the board clean with a damp washcloth.
Have fun!!
No comments:
Post a Comment