
Hey crafters! I've got a super easy, affordable, and fun way to jazz up all those old headbands you've got lying around. This project technically cost me $0 because I had all of the materials already, but if you were to buy all the materials new (not including the headband, and substituting Mod Podge for Elmer's Glue as a cheaper alternative) this project will EASILY be under $5.
Here's what I used:
 |
| Old headband, scissors, 5 different colors of embroidery thread, Mod Podge (you can substitute this for Elmer's or clear nail polish as a cheaper alternative.) |
I chose these five colors - Orange, turquoise, white, goldenrod, and magenta. Everything I have been making lately has been very SPRING oriented. I just hope it actually gets here soon. (I cannot believe it has been snowing in April! WTF!?) Anywho...

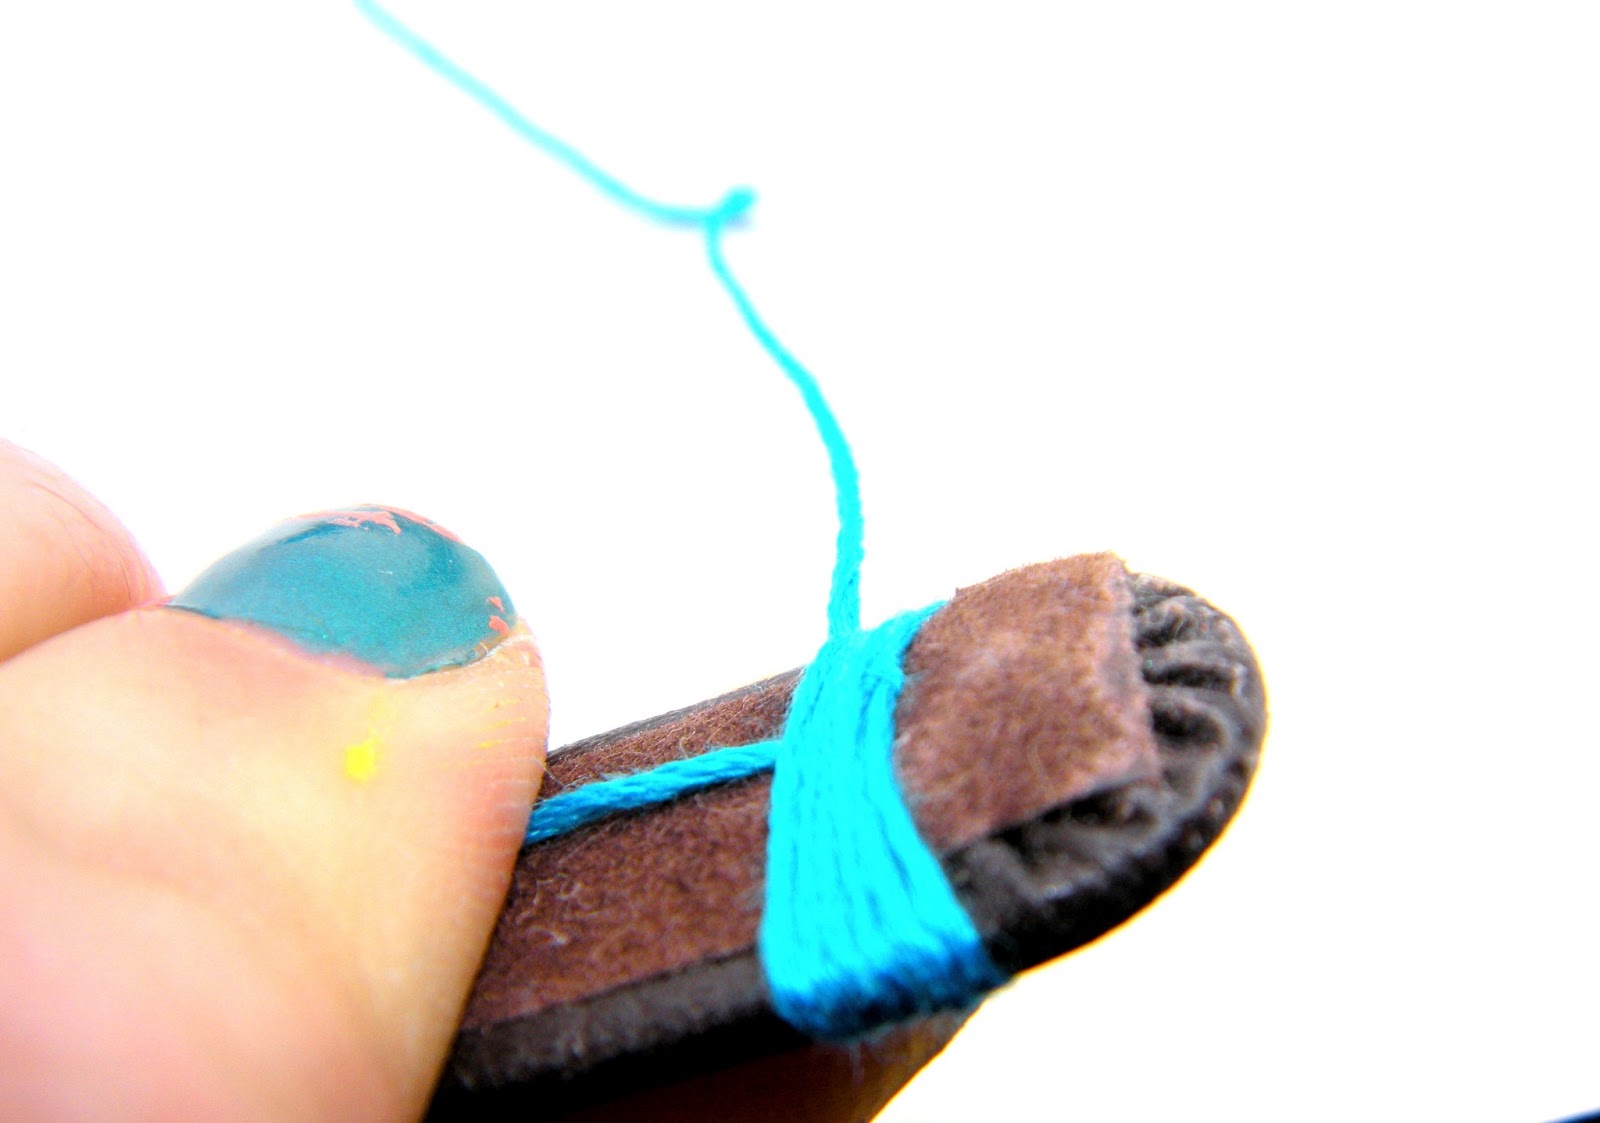
Pick the color you want to start with (in my case, turquoise). Begin by knotting your strand around the bottom of one side of the headband. Keep the knot to the inside of the headband. Avoid tying it too close to the rounded end if you have one, you don't want the embroidery thread to slip off while you are working. Make sure to leave a tail that's a few inches long.

Begin tightly wrapping your embroidery thread around the headband, making sure each strand is next to the one before it and that they are not overlapping or bunching up.

You also will want to keep the tail underneath the wrapping, you will use this tail later to help start the next section of color.
Just keep wrapping, just keep wrapping....

Once you are satisfied with the length of that section, go ahead and knot the tail you left earlier to the wrapping end of the embroidery thread as pictured below, so that it is secure. Make sure your knot is tight against the inside of the headband.

Pick a new color, and knot the end of that to the previous color's knot. Again, leave a few inches of a tail.

Start wrapping your second color much like the first.


Here is the finished headband:

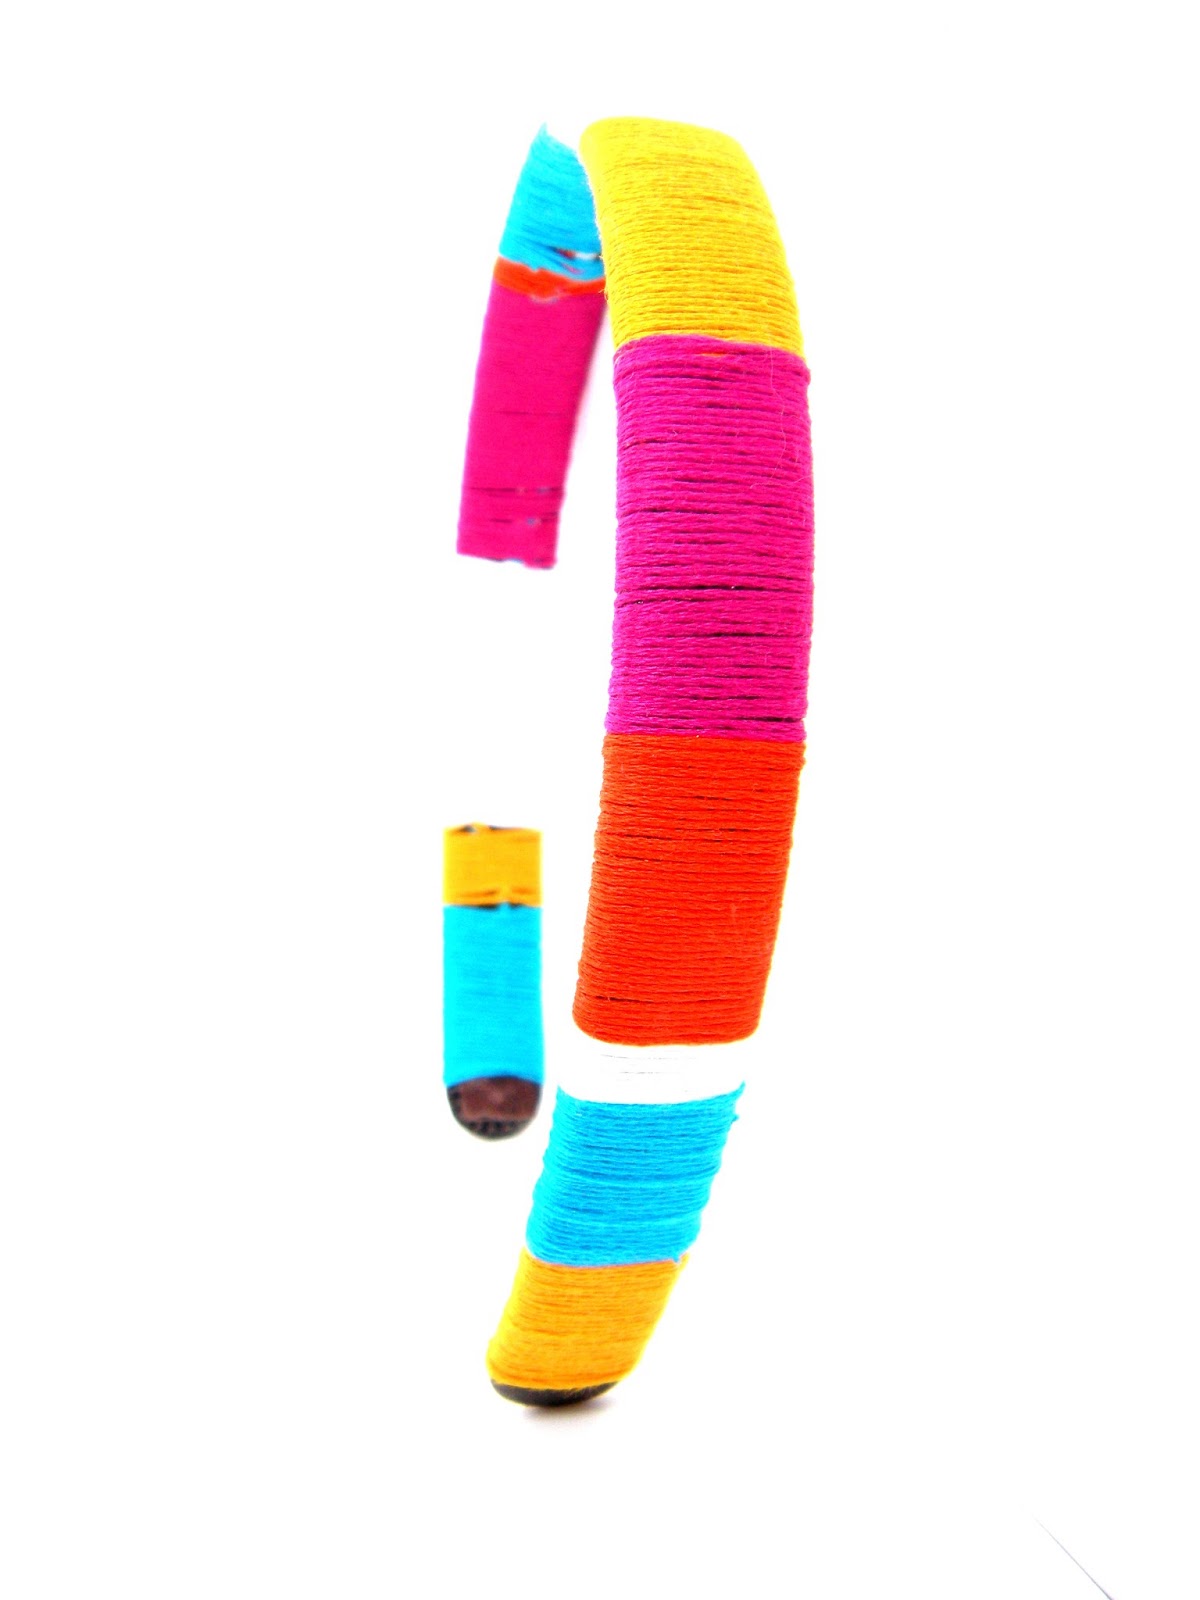
I personally love this project, and I think it would be super cute with an ombre effect. I think that's what I'll be doing with my next one. :) Happy crafting!
As always, if you have a question or comment, feel free to post here or email me at Quirkability@gmail.com
xoxo, Meagan


.jpg)


